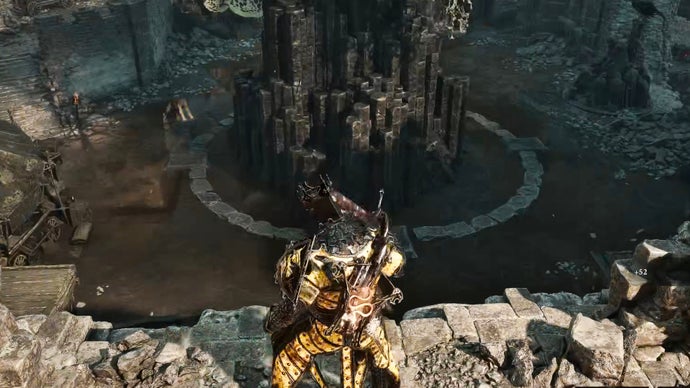
Mortal Shell 2: High Lord's Keep walkthrough (Part 19)
๐Ÿ–ฅ PlayStation, Xbox, PCGuides / Walkthroughs
#PS5#Action Adventure#Third person#Single Player#Mortal Shell II

Mortal Shell 2: High Lord's Keep walkthrough (Part 19)

Rock Paper Shotgun ยป Guidesโœ Ollie Tomsโฑ 20 min read(about 4 hours ago)

Overview & Key Takeaways

The Deserted Slums were all but conquered in the last part of our Mortal Shell 2 walkthrough, but now it's time for even greater threats. Vellen, The High Lord Of Mammon is waiting to be fought, and his treasures wrested from his grasp deep in the Royal Crypt below the High Lord's Keep.

This area won't take terribly long for you to complete, but there are numerous easily missed valuables and pathways which our guide below lays out clearly. So follow the steps in our guide to ensure a full 100% walkthrough of the High Lord's Keep!

Read more

The Deserted Slums were all but conquered in the last part of our Mortal Shell 2 walkthrough, but now it's time for even greater threats. Vellen, The High Lord Of Mammon is waiting to be fought, and his treasures wrested from his grasp deep in the Royal Crypt below the High Lord's Keep.

This area won't take terribly long for you to complete, but there are numerous easily missed valuables and pathways which our guide below lays out clearly. So follow the steps in our guide to ensure a full 100% walkthrough of the High Lord's Keep!

Want the walkthrough for a different area of the game? You'll find the full list of all our guides on our Mortal Shell 2 walkthrough hub page!

High Lord's Keep walkthrough steps:

  1. Cross the bridge into the Keep.
  2. Obtain the Map Of Mammon [6].
  3. Activate the High Lord's Courtyard Beacon.
  4. Reach the Ramparts.
  5. Enter the Royal Crypt Of Mammon.
  6. Defeat Vellen, High Lord Of Mammon.
  7. Unlock Lazlo's Shell.
  8. Return to the Gate Of Mammon Beacon.
  9. Conquer the Besieged Ruins.

To see this content please enable targeting cookies.

Manage cookie settings

1. Cross the bridge into the Keep.

From the High Lord's Terrace Beacon, head up the steps to your left. Two Mycellian Skulks will have already noticed you from above; kill them as they approach.

A Mortal Shell 2 screenshot showing the perfect path the player should take through the High Lord's Keep according to Rock Paper Shotgun's full walkthrough of the game. A Mortal Shell 2 screenshot showing the perfect path the player should take through the High Lord's Keep according to Rock Paper Shotgun's full walkthrough of the game.

Image credit: Rock Paper Shotgun/Playstack

Ahead of you is a Tarred Vestige and two sleeping Lithopods which awaken as you near. Defeat them all, and be careful of the catapults across the way, which continue to hurl flaming projectiles near the bridge ahead. Once they're dead, loot the Tarspore in the roots to the right.

Before you cross the bridge, turn around and you'll see another set of stairs by the stone wall. Climb them and loot the chest at the top for a Tooth Of Nochte.

A Mortal Shell 2 screenshot showing the perfect path the player should take through the High Lord's Keep according to Rock Paper Shotgun's full walkthrough of the game. A Mortal Shell 2 screenshot showing the perfect path the player should take through the High Lord's Keep according to Rock Paper Shotgun's full walkthrough of the game.

A Mortal Shell 2 screenshot showing the perfect path the player should take through the High Lord's Keep according to Rock Paper Shotgun's full walkthrough of the game. A Mortal Shell 2 screenshot showing the perfect path the player should take through the High Lord's Keep according to Rock Paper Shotgun's full walkthrough of the game.

Image credit: Rock Paper Shotgun/Playstack

Now turn and cross the bridge to enter the High Lord's Keep.

Mark step as completed.

2. Obtain the Map Of Mammon [6].

Ahead of you is a tough fight (for a non-boss encounter). Remember Tishina's Confessor, the miniboss just before you fought the Nameless Captive? This is the regular version of that boss: an Anointed Confessor. Much like Gloom Seekers, they hit very hard, and their combos can slaughter you quickly if you're not on top of your parrying/dodging game.

A Mortal Shell 2 screenshot showing the perfect path the player should take through the High Lord's Keep according to Rock Paper Shotgun's full walkthrough of the game. A Mortal Shell 2 screenshot showing the perfect path the player should take through the High Lord's Keep according to Rock Paper Shotgun's full walkthrough of the game.

A Mortal Shell 2 screenshot showing the perfect path the player should take through the High Lord's Keep according to Rock Paper Shotgun's full walkthrough of the game. A Mortal Shell 2 screenshot showing the perfect path the player should take through the High Lord's Keep according to Rock Paper Shotgun's full walkthrough of the game.

Image credit: Rock Paper Shotgun/Playstack

Flanking the Confessor are two Foul Knights. Take the fight carefully, and don't engage more than one foe at once. Once they're dead, head opposite the bridge, ignoring the gated entrance to the Keep on your left which the Confessor was guarding.

Take the first left down a narrow alleyway, and kill the Nocteserpers in your way. Wrap around and loot the Common Moonshine from the boxes, before heading up the steps to where an air current is blowing. Don't take the air current - instead, go up the ramp to the left and through the doorway.

A Mortal Shell 2 screenshot showing the perfect path the player should take through the High Lord's Keep according to Rock Paper Shotgun's full walkthrough of the game. A Mortal Shell 2 screenshot showing the perfect path the player should take through the High Lord's Keep according to Rock Paper Shotgun's full walkthrough of the game.

A Mortal Shell 2 screenshot showing the perfect path the player should take through the High Lord's Keep according to Rock Paper Shotgun's full walkthrough of the game. A Mortal Shell 2 screenshot showing the perfect path the player should take through the High Lord's Keep according to Rock Paper Shotgun's full walkthrough of the game.

Image credit: Rock Paper Shotgun/Playstack

Exit out of the room via the opposite corner, and loot the 2x Common Moonshine by the boxes immediately on your left. After that, head down both sets of steps in front of you and you'll enter the courtyard on the other side of that locked gate.

Cross to the opposite side, where Ruk can be found atop another of his statues. Loot the 2x Martyr's Ash at the base of the statue, and then pick up the Map Of Mammon [6].

A Mortal Shell 2 screenshot showing the perfect path the player should take through the High Lord's Keep according to Rock Paper Shotgun's full walkthrough of the game. A Mortal Shell 2 screenshot showing the perfect path the player should take through the High Lord's Keep according to Rock Paper Shotgun's full walkthrough of the game.

Image credit: Rock Paper Shotgun/Playstack

Mark step as completed.

3. Activate the High Lord's Courtyard Beacon.

Go to the locked gate beside Ruk, and you'll see a lever on the wall to the left of the gate. Use it to open the gate, allowing a shortcut through.

A Mortal Shell 2 screenshot showing the perfect path the player should take through the High Lord's Keep according to Rock Paper Shotgun's full walkthrough of the game. A Mortal Shell 2 screenshot showing the perfect path the player should take through the High Lord's Keep according to Rock Paper Shotgun's full walkthrough of the game.

A Mortal Shell 2 screenshot showing the perfect path the player should take through the High Lord's Keep according to Rock Paper Shotgun's full walkthrough of the game. A Mortal Shell 2 screenshot showing the perfect path the player should take through the High Lord's Keep according to Rock Paper Shotgun's full walkthrough of the game.

Image credit: Rock Paper Shotgun/Playstack

Now turn around and activate the High Lord's Courtyard Beacon. Rest there if needed, but you don't need to cleanse it.

Mark step as completed.

5. Enter the Royal Crypt Of Mammon.

The right-hand side as you enter the ramparts holds a Common Moonshine. Collect it, then follow the path through three Brigands, looting another 500x Coin Pouch in the left corner at the first turn.

Drop off the left-hand side once you reach the end of the path. Turn left, and kill the three Foul Knights in your way. Loot the throne for a Dorsalite.

A Mortal Shell 2 screenshot showing the perfect path the player should take through the High Lord's Keep according to Rock Paper Shotgun's full walkthrough of the game. A Mortal Shell 2 screenshot showing the perfect path the player should take through the High Lord's Keep according to Rock Paper Shotgun's full walkthrough of the game.

A Mortal Shell 2 screenshot showing the perfect path the player should take through the High Lord's Keep according to Rock Paper Shotgun's full walkthrough of the game. A Mortal Shell 2 screenshot showing the perfect path the player should take through the High Lord's Keep according to Rock Paper Shotgun's full walkthrough of the game.

Image credit: Rock Paper Shotgun/Playstack

Now turn around and head to the opposite side. Kill the Knight Of Mammon guarding the tree, and loot the base of the tree for 4x Tarspore. At the far end, you'll see the air current below you on the right, which means this path leads back to the gate. Don't take it, it's just for your reference.

A Mortal Shell 2 screenshot showing the perfect path the player should take through the High Lord's Keep according to Rock Paper Shotgun's full walkthrough of the game. A Mortal Shell 2 screenshot showing the perfect path the player should take through the High Lord's Keep according to Rock Paper Shotgun's full walkthrough of the game.

Image credit: Rock Paper Shotgun/Playstack

In the opposite corner around the tree, loot the fireplace for a Burnt Effigy. Then go back to the start, and head through the doorway opposite the ramparts.

In the adjoining room, turn right and kill the Foul Knight at the far end. It was guarding a Revered Gland. Loot it, and then turn around and head out of the room.

A Mortal Shell 2 screenshot showing the perfect path the player should take through the High Lord's Keep according to Rock Paper Shotgun's full walkthrough of the game. A Mortal Shell 2 screenshot showing the perfect path the player should take through the High Lord's Keep according to Rock Paper Shotgun's full walkthrough of the game.

A Mortal Shell 2 screenshot showing the perfect path the player should take through the High Lord's Keep according to Rock Paper Shotgun's full walkthrough of the game. A Mortal Shell 2 screenshot showing the perfect path the player should take through the High Lord's Keep according to Rock Paper Shotgun's full walkthrough of the game.

Image credit: Rock Paper Shotgun/Playstack

Kill the Leechtongue outside, and head up the stairs to your left. Up here there's a chest you can open for a hefty 2500x Coin.

Now descend the steps again and turn right. Head through the giant archway and kill the two Tarred Vestiges in this outdoor area. Around the left side of the rock you'll find another Tarspore, and also a Bone Statue holding a Laterite.

A Mortal Shell 2 screenshot showing the perfect path the player should take through the High Lord's Keep according to Rock Paper Shotgun's full walkthrough of the game. A Mortal Shell 2 screenshot showing the perfect path the player should take through the High Lord's Keep according to Rock Paper Shotgun's full walkthrough of the game.

A Mortal Shell 2 screenshot showing the perfect path the player should take through the High Lord's Keep according to Rock Paper Shotgun's full walkthrough of the game. A Mortal Shell 2 screenshot showing the perfect path the player should take through the High Lord's Keep according to Rock Paper Shotgun's full walkthrough of the game.

Image credit: Rock Paper Shotgun/Playstack

Head through the archways at the far end, and loot the 3x Weltcaps here. Opposite the Weltcaps, there's a doorway which leads down a long set of stairs. Head down it to enter the Royal Crypt Of Mammon - the whole reason for you being here.

Mark step as completed.

6. Defeat Vellen, High Lord Of Mammon.

Inside the dark halls of the Royal Crypt Of Mammon, you'll see a corridor leading ahead, and also sprouting side paths to the left and right. First, bait the Knight Of Mammon on the main path into attacking you, and kill it.

A Mortal Shell 2 screenshot showing the perfect path the player should take through the High Lord's Keep according to Rock Paper Shotgun's full walkthrough of the game. A Mortal Shell 2 screenshot showing the perfect path the player should take through the High Lord's Keep according to Rock Paper Shotgun's full walkthrough of the game.

Image credit: Rock Paper Shotgun/Playstack

Then head down the first left path, kill the two Foul Knights, and loot the coffin for a Martyr's Ash. Turn around and do exactly the same on the identical right-hand path for another Martyr's Ash.

A Mortal Shell 2 screenshot showing the perfect path the player should take through the High Lord's Keep according to Rock Paper Shotgun's full walkthrough of the game. A Mortal Shell 2 screenshot showing the perfect path the player should take through the High Lord's Keep according to Rock Paper Shotgun's full walkthrough of the game.

A Mortal Shell 2 screenshot showing the perfect path the player should take through the High Lord's Keep according to Rock Paper Shotgun's full walkthrough of the game. A Mortal Shell 2 screenshot showing the perfect path the player should take through the High Lord's Keep according to Rock Paper Shotgun's full walkthrough of the game.

Image credit: Rock Paper Shotgun/Playstack

Now proceed to the next set of left and right paths, which are again identical, with one exception: behind each coffin, you'll also find a Dorsalite. So in total, you'll get 2x Martyr's Ash and 2x Dorsalite from these next side paths.

Now head to the end of the main path. You'll enter a circular room containing a boss: Vellen, High Lord Of Mammon.

A Mortal Shell 2 screenshot showing the perfect path the player should take through the High Lord's Keep according to Rock Paper Shotgun's full walkthrough of the game. A Mortal Shell 2 screenshot showing the perfect path the player should take through the High Lord's Keep according to Rock Paper Shotgun's full walkthrough of the game.

Image credit: Rock Paper Shotgun/Playstack

Vellen is another Confessor-adjacent boss. Wielding a scythe and predisposed to swinging it in giant arcing combos, he can whittle your health down very quickly. Fortunately, you can do the same to him, as he doesn't have a very high health pool at all.

There are no real tricks up Vellen's sleeve beyond his combos. No second phase, no dangerous unexpected moves. Kill him, and you'll receive a Glimpse for your trouble - and 6666x Gloom.

Mark step as completed.

7. Unlock Lazlo's Shell.

The three gates exiting this room will open once Vellen is defeated. Check the side rooms first: you can read the inscriptions on each coffin to learn who they were, and also open the chest behind each coffin for a total of 4x Coins Of Mammon.

A Mortal Shell 2 screenshot showing the perfect path the player should take through the High Lord's Keep according to Rock Paper Shotgun's full walkthrough of the game. A Mortal Shell 2 screenshot showing the perfect path the player should take through the High Lord's Keep according to Rock Paper Shotgun's full walkthrough of the game.

A Mortal Shell 2 screenshot showing the perfect path the player should take through the High Lord's Keep according to Rock Paper Shotgun's full walkthrough of the game. A Mortal Shell 2 screenshot showing the perfect path the player should take through the High Lord's Keep according to Rock Paper Shotgun's full walkthrough of the game.

Image credit: Rock Paper Shotgun/Playstack

Then head through the exit straight on from the arena. Loot the Justiciar's Stone from the stone slab, and then proceed down the steps beyond it to find the true treasure of this dungeon: Lazlo's Shell.

A Mortal Shell 2 screenshot showing the perfect path the player should take through the High Lord's Keep according to Rock Paper Shotgun's full walkthrough of the game. A Mortal Shell 2 screenshot showing the perfect path the player should take through the High Lord's Keep according to Rock Paper Shotgun's full walkthrough of the game.

Image credit: Rock Paper Shotgun/Playstack

Inhabit the shell to enter Lazlo's first Memory: The Visit. There's little to do in this memory except walk forward and converse with Vellen. Once you're out of the memory, you'll learn of Lazlo's abilities: namely, his special armour, which provides damage reduction, and can also be overheated to trigger powerful burning shockwaves (at the cost of temporarily removing said damage reduction).

Once again, you can use any Shell you like for this walkthrough. So if you like the look of Lazlo, by all means switch! But it's not necessary to do so.

Mark step as completed.

8. Return to the Gate Of Mammon Beacon.

A Mortal Shell 2 screenshot showing the perfect path the player should take through the High Lord's Keep according to Rock Paper Shotgun's full walkthrough of the game. A Mortal Shell 2 screenshot showing the perfect path the player should take through the High Lord's Keep according to Rock Paper Shotgun's full walkthrough of the game.

A Mortal Shell 2 screenshot showing the perfect path the player should take through the High Lord's Keep according to Rock Paper Shotgun's full walkthrough of the game. A Mortal Shell 2 screenshot showing the perfect path the player should take through the High Lord's Keep according to Rock Paper Shotgun's full walkthrough of the game.

Image credit: Rock Paper Shotgun/Playstack

Exit all the way out of the Royal Crypt Of Mammon. Take the right-hand path to the end, and exit through the archway by the steps.

There's a Skulk on your right to kill, after which you can loot the Ventrium it was guarding. Then turn and cross the wooden bridge, killing the Skulk there too.

On the lower ledge there's a Leechtongue by a tree. Kill it, and then pull the lever on the wall by the elevator shaft. Ride the elevator down, and use the Bone Gate.

A Mortal Shell 2 screenshot showing the perfect path the player should take through the High Lord's Keep according to Rock Paper Shotgun's full walkthrough of the game. A Mortal Shell 2 screenshot showing the perfect path the player should take through the High Lord's Keep according to Rock Paper Shotgun's full walkthrough of the game.

Image credit: Rock Paper Shotgun/Playstack

Tada! You're back at the Gate Of Mammon Beacon. Rest there if you like.

Mark step as completed.

9. Conquer the Besieged Ruins.

There's one more task I'll tack onto the end of this section, because it does take place more or less in the same area. From the Bone Gate by the Gate Of Mammon Beacon, head up the steps directly in front of you.

A Mortal Shell 2 screenshot showing the perfect path the player should take through the High Lord's Keep according to Rock Paper Shotgun's full walkthrough of the game. A Mortal Shell 2 screenshot showing the perfect path the player should take through the High Lord's Keep according to Rock Paper Shotgun's full walkthrough of the game.

A Mortal Shell 2 screenshot showing the perfect path the player should take through the High Lord's Keep according to Rock Paper Shotgun's full walkthrough of the game. A Mortal Shell 2 screenshot showing the perfect path the player should take through the High Lord's Keep according to Rock Paper Shotgun's full walkthrough of the game.

Image credit: Rock Paper Shotgun/Playstack

Kill all the Wretches and Brigands here (or just run past them), and cross the bridge on your left and left again (opposite the next set of steps).

Kill the next Brigand, and then cross the second bridge. This will take you to a closed off lower cliffside path adjacent to the High Lord's Keep. Kill the Stoner and the Brigands at the end of the path, and loot the Laterite on the Bone Statue (as well as the 2x Common Moonshine around it).

A Mortal Shell 2 screenshot showing the perfect path the player should take through the High Lord's Keep according to Rock Paper Shotgun's full walkthrough of the game. A Mortal Shell 2 screenshot showing the perfect path the player should take through the High Lord's Keep according to Rock Paper Shotgun's full walkthrough of the game.

A Mortal Shell 2 screenshot showing the perfect path the player should take through the High Lord's Keep according to Rock Paper Shotgun's full walkthrough of the game. A Mortal Shell 2 screenshot showing the perfect path the player should take through the High Lord's Keep according to Rock Paper Shotgun's full walkthrough of the game.

Image credit: Rock Paper Shotgun/Playstack

Then go back and enter the dungeon you passed by, on your left side as you approached the enemies. These are the Besieged Ruins.

This won't take long at all. Head down the elevator and kill the Neophyte Sester ahead. Head through the doorway and kill the Torch Cultists beyond, and the Frog Cultist behind them. Loot the chest on your left in this room for a Dorsalite, and on the right for a Winterglass Gem.

A Mortal Shell 2 screenshot showing the perfect path the player should take through the High Lord's Keep according to Rock Paper Shotgun's full walkthrough of the game. A Mortal Shell 2 screenshot showing the perfect path the player should take through the High Lord's Keep according to Rock Paper Shotgun's full walkthrough of the game.

A Mortal Shell 2 screenshot showing the perfect path the player should take through the High Lord's Keep according to Rock Paper Shotgun's full walkthrough of the game. A Mortal Shell 2 screenshot showing the perfect path the player should take through the High Lord's Keep according to Rock Paper Shotgun's full walkthrough of the game.

Image credit: Rock Paper Shotgun/Playstack

Now, curiously, this is where the Besieged Ruins stand out from other dungeons you've encountered. At the end of this room - what appears to be a rather ignoble final room of a dungeon - there's a helmet with an arrow pierced through it. Touch the helmet to enter a unique memory sequence.

A Mortal Shell 2 screenshot showing the perfect path the player should take through the High Lord's Keep according to Rock Paper Shotgun's full walkthrough of the game. A Mortal Shell 2 screenshot showing the perfect path the player should take through the High Lord's Keep according to Rock Paper Shotgun's full walkthrough of the game.

Image credit: Rock Paper Shotgun/Playstack

In the memory, a battle unfolds: the Schism of Mammon. Your objective is simply to fight to the very end. There's nothing to collect here, and you also cannot be harmed. Nor can you block, which is rather strange, but just keep swinging until everything in your way dies.

A Mortal Shell 2 screenshot showing the perfect path the player should take through the High Lord's Keep according to Rock Paper Shotgun's full walkthrough of the game. A Mortal Shell 2 screenshot showing the perfect path the player should take through the High Lord's Keep according to Rock Paper Shotgun's full walkthrough of the game.

A Mortal Shell 2 screenshot showing the perfect path the player should take through the High Lord's Keep according to Rock Paper Shotgun's full walkthrough of the game. A Mortal Shell 2 screenshot showing the perfect path the player should take through the High Lord's Keep according to Rock Paper Shotgun's full walkthrough of the game.

Image credit: Rock Paper Shotgun/Playstack

At the very end, just past the final enemy (a Knight Of Mammon), you'll be shot through the head with an arrow, and returned to the present day. Your reward for this crusade? The Zealot's Stone, which gives you access to a special Light Combo Finisher that generates extra Resolve.

A Mortal Shell 2 screenshot showing the perfect path the player should take through the High Lord's Keep according to Rock Paper Shotgun's full walkthrough of the game. A Mortal Shell 2 screenshot showing the perfect path the player should take through the High Lord's Keep according to Rock Paper Shotgun's full walkthrough of the game.

A Mortal Shell 2 screenshot showing the perfect path the player should take through the High Lord's Keep according to Rock Paper Shotgun's full walkthrough of the game. A Mortal Shell 2 screenshot showing the perfect path the player should take through the High Lord's Keep according to Rock Paper Shotgun's full walkthrough of the game.

Image credit: Rock Paper Shotgun/Playstack

That's everything, so return out of the Besieged Ruins. You can now either use the air current, which sends you up near the gate of the High Lord's Keep; or you can just head back the way you came, across the bridges. Either way, head back to the Gate Of Mammon Beacon, ready for the next stage of your journey.

Mark step as completed.

The High Lord's Keep is now completely emptied of all its treasures, and there's just one small section of the Deserted Slums which we haven't yet explored (other than the upcoming legacy dungeon, of course). So join us in Part 20 and our Mortal Shell 2 Lonesome Spire walkthrough for the next steps of your 100% playthrough!


Share:

More in PlayStation, Xbox, PC

The Blood of Dawnwalker: How to complete Home Sweet Home๐Ÿ–ฅ PlayStation, Xbox, PC

The Blood of Dawnwalker: How to complete Home Sweet Home

!(https://assetsio.gnwcdn.com/home-sweet-home-coen-alin.jpg?width=690&quality=85&format=jpg&auto=webp) One of the best quests in The Blood of Dawnwalker(https://www.rockpapershotgun.com/games/dawnwalker) is Home Sweet Home, which sees Coen trapped in an illusory, looping dream where he's finally reunited with his family. This quest not only provides good loot upon completion, but it also leads into one of the game's endings, and serves up moving details behind Coen's relationship with his loved ones, particularly his dearly departed little brother, Alin. Home Sweet Home, incidentally, is also one of the tougher quests of the game, as it isn't immediately clear how to leave the loop. Coen's also stripped of his gear and forced to fight a tough selection of enemies during the day, which can be frustrating especially if you've focused more on giving him vampire skills(https://www.rockpapershotgun.com/the-blood-of-dawnwalker-best-skills-to-get-early). In this guide, we'll help you out by explaining how to complete the Home Sweet Home quest in The Blood of Dawnwalker, making sure that you know exactly what to do to escape this sinister dream realm. Read more(https://www.rockpapershotgun.com/the-blood-of-dawnwalker-how-to-complete-home-sweet-home)

RockGuides / Walkthroughsabout 4 hours ago
Steam's Chart-topping FPS Wardogs Finally Gets Official Console Release Window๐Ÿ–ฅ PlayStation, Xbox, PC, Multi-platform

Steam's Chart-topping FPS Wardogs Finally Gets Official Console Release Window

Wardogs, the immensely popular military FPS that has just released into Steam Early Access, has a confirmed console release window.

๐ŸŽฎ Halo๐ŸŽฎ Steam's Chart-topping FPS Wardogs Finally
PolygonNewsabout 6 hours ago
PlayStation tried to cancel Hideo Kojima's Physint, now Xbox is publishing it๐Ÿ–ฅ PlayStation, Xbox, PC

PlayStation tried to cancel Hideo Kojima's Physint, now Xbox is publishing it

The console war factions sure know how to fight.

๐ŸŽฎ now Xbox
PCNewsabout 19 hours ago