Pragmata: All 15 Mini Cabin Figure locations
Overview & Key Takeaways
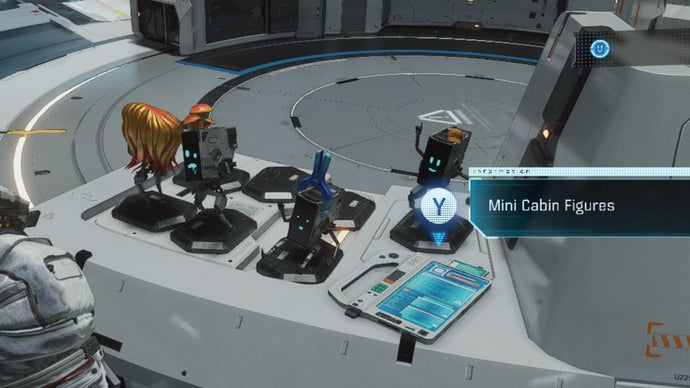
Trying to get all 15 Mini Cabin Figures in Pragmata? Scattered throughout Pragmata's Sectors are little collectibles called Mini Cabin Figures. Smaller versions of your friendly Shelter companion Cabin, these Mini Cabin Figures serve no real purpose - they simply look cool and cute, and that means you gotta collect 'em all.
Trying to get all 15 Mini Cabin Figures in Pragmata? Scattered throughout Pragmata's Sectors are little collectibles called Mini Cabin Figures. Smaller versions of your friendly Shelter companion Cabin, these Mini Cabin Figures serve no real purpose - they simply look cool and cute, and that means you gotta collect 'em all.
If you're familiar with Resident Evil Requiem and other entries in Capcom's flagship series, then you'll find Mini Cabin Figures very similar to the elusive Mr. Raccoon bobbleheads, right down to the telltale song that they sing whenever you're near one. Shooting all these little fellas will have them appear in your Shelter and eventually net you the "Mini-Hunter Supreme" achievement, but this is easier said than done, because they're often hidden in hard-to-spot nooks and crannies.
In this guide, we'll help you by revealing the locations of all 15 Mini Cabin Figures in Pragmata, presenting detailed screenshots and instructions to ensure that you can zap every single one.
All Mini Cabin Figure locations in Pragmata
The following table lists the locations of all 15 Mini Cabin Figures in Pragmata across all six Sectors, specifying which Block each figure appears in, as well as the nearest Escape Hatch.
| Figure | Sector | Block | Nearest Escape Hatch |
|---|---|---|---|
| 1 | Solar Power Plant | Power Distribution Center | Main Control Lobby |
| 2 | Solar Power Plant | Power Distribution Center | Main Control Lobby |
| 3 | Solar Power Plant | The Concourse | Main Control Lobby |
| 4 | Mass Production Array | Shopping District | Shopping District - Entrance |
| 5 | Mass Production Array | Side Alley | Interconnecting Passage |
| 6 | Mass Production Array | Lim Recycling Facility | Recycling Control |
| 7 | Terra Dome | Eco Modeling Lab | Envirolytics Lab Station |
| 8 | Terra Dome | Soil Research | GeoScience Lab Station |
| 9 | Terra Dome | Soil Research | GeoScience Lab Station |
| 10 | Lunum Mines | Crane Operation Yard | Crane Control Room Station |
| 11 | Lunum Mines | Warehouse | Warehouse Exit Station |
| 12 | Lunum Mines | Nexus Tower | Tower Access Point Station |
| 13 | Central Port | Port Entrance | Cargo Terminal Station |
| 14 | Central Port | Regolith Lab | Research Sector Lobby Station |
| 15 | Central Port | Orbital Elevator | Laboratory - Main Entrance Station |
Below, we'll list the details of each Mini Cabin Figure and its associated location.
Mini Cabin Figure #1
- Sector: Solar Power Plant
- Block: Power Distribution Center
- Nearest Escape Hatch: Main Control Lobby

Image credit: Rock Paper Shotgun/Capcom
Your first Mini Cabin Figure is close to an area that you can't access at the start of the game due to a blockage of dead Lunafilament. You'll clear this blockage with the Lim Eraser later, but for now, face it and turn to your right slightly; atop a nearby canister you'll see Mini Cabin Figure #1.
Mini Cabin Figure #2
- Sector: Solar Power Plant
- Block: Power Distribution Center
- Nearest Escape Hatch: Main Control Lobby


Shortly after finding your first REM, check the beds along the wall. | Image credit: Rock Paper Shotgun/Capcom
Prior to reaching the Main Control Lobby, Hugh and Diana will find their first REM, the Globe. If you search the bed spaces inlaid in the wall near the REM, the second Mini Cabin Figure is hiding here.
Mini Cabin Figure #3
- Sector: Solar Power Plant
- Block: The Concourse
- Nearest Escape Hatch: Main Control Lobby

Image credit: Rock Paper Shotgun/Capcom
Right before the central chamber in the Concourse that leads to the SectorGuard boss fight, look above you to see this Mini Cabin Figure perched atop a fan vent on the wall.
Mini Cabin Figure #4
- Sector: Mass Production Array
- Block: Side Alley
- Nearest Escape Hatch: Interconnecting Passage


After reaching the Orbit mannequin department store, go towards the blue handlift and then look up to find the figure. | Image credit: Rock Paper Shotgun/Capcom
This one's found shortly after you leave the room with all of the mannequins, where Hugh attempts to explain to Diana the difference between dolls and humans. You'll eventually come across a hand lift that takes you to the rooftops; the Mini Cabin Figure is located near the Redmax sign.
Mini Cabin Figure #5
- Sector: Mass Production Array
- Block: Lim Recycling Facility
- Nearest Escape Hatch: Recycling Control


Peer out the window of this room and look to the ledge to find the Mini Cabin Figure. | Image credit: Rock Paper Shotgun/Capcom
This Mini Cabin Figure is found shortly after Hugh and Diana enter an office that looks like it's undergoing partial 3D printing renovation. After Hugh tells Diana about eating meals with his family, go out the window and look for the figure hiding on the ledge behind you, just beyond the greenery.
Mini Cabin Figure #6
- Sector: Mass Production Array
- Block: Lim Recycling Facility
- Nearest Escape Hatch: Recycling Control

Image credit: Rock Paper Shotgun/Capcom
The last Mini Cabin Figure of the Mass Production Array is easy to find, as it's in the same room as the Recycling Control Escape Hatch, inside a large container.
Mini Cabin Figure #7
- Sector: Terra Dome
- Block: Eco Modeling Lab
- Nearest Escape Hatch: Envirolytics Lab Station


Look up once you're at this tree unit that needs printing. (You run into multiple units during this level; we're specifically referring to the first one here.) | Image credit: Rock Paper Shotgun/Capcom
In the Eco Modeling Lab, you can find this Mini Cabin Figure near the first 3D printing unit that hasn't finished creating a tree and is in need of a Gen Chip. Look at the branches along the ceiling.
Mini Cabin Figure #8
- Sector: Terra Dome
- Block: Soil Research
- Nearest Escape Hatch: GeoScience Lab Station


This figure can be found on the bridge leading from the beach, shortly after you get the Photon Laser. | Image credit: Rock Paper Shotgun/Capcom
Shortly after reaching the beach and obtaining the Photon Laser in the Terra Dome, ride the lift upwards, defeat the next group of enemies, and then turn towards the tree behind you to find Mini Cabin Figure #8.
Mini Cabin Figure #9
- Sector: Terra Dome
- Block: Soil Research
- Nearest Escape Hatch: GeoScience Lab Station
Once you're in the rec room where this note is located, look for an REM. You can only get it by exiting the room and using the Lim Eraser on a blockage of dead Lunafilament, which leads to both the Swing REM and this Mini Cabin Figure.
You'll need the Lim Eraser to reach this Mini Cabin Figure, as it's in a container next to the Swing REM, but blocked off by a dead Lunafilament mass. The REM is visible from the staff relaxation room in Soil Research that has the little Easter Egg with a note marked "2026, it's real" on one of the beds. (This is a reference to Pragmata's often-delayed release date, and appeared in the game's trailer.)
Mini Cabin Figure #10
- Sector: Lunum Mines
- Block: Crane Operation Yard
- Nearest Escape Hatch: Crane Control Room Station


This is a fairly large area, but you can find this figure on a building corner opposite of a panel used to drop one of those large shipping containers. | Image credit: Rock Paper Shotgun/Capcom
In the northeastern half of the Crane Operation Yard, you'll find this Mini Cabin Figure hanging out on a ledge by the corner of a building. If you're having trouble orientating yourself, on the wall opposite it is a panel that can be hacked to make a container fall downwards.
Mini Cabin Figure #11
- Sector: Lunum Mines
- Block: Warehouse
- Nearest Escape Hatch: Warehouse Exit Station


So many boxes around here! But thankfully, the Mini Cabin Figure isn't atop one of them - instead, it's near the ceiling. | Image credit: Rock Paper Shotgun/Capcom
After entering the Warehouse, you'll eventually come across a very large room that overlooks multiple "MOVE" and "LOCKED" blocks that you'll need to hack and push around. Mini Cabin Figure #11 is hidden near the ceiling atop an orange crane.
Mini Cabin Figure #12
- Sector: Lunum Mines
- Block: Nexus Tower
- Nearest Escape Hatch: Tower Access Point Station

Image credit: Rock Paper Shotgun/Capcom
After unlocking the Tower Access Point Station Escape Hatch, go into the next room to see stairs leading down to a collapsed section of floor. Mini Cabin Figure #12 can be sighted right before dropping down, sitting atop a piece of machinery on the left.
Mini Cabin Figure #13
- Sector: Central Port
- Block: Port Entrance
- Nearest Escape Hatch: Cargo Terminal Station

Image credit: Rock Paper Shotgun/Capcom
After unlocking the Cargo Terminal Station Escape Hatch, head down the stairs and immediately angle yourself right by the railing to spot Mini Cabin Figure #13 perched on a ledge. (The Parasol REM is also nearby in a room that requires a jump to access.)
Mini Cabin Figure #14
- Sector: Central Port
- Block: Regolith Lab
- Nearest Escape Hatch: Research Sector Lobby Station

Image credit: Rock Paper Shotgun/Capcom
From the Research Sector Lobby Station Escape Hatch, climb up the left set of stairs and then proceed to the door marked "Sec .06." The Mini Cabin Figure is within this room, atop an orange pipe near the ceiling.
Mini Cabin Figure #15
- Sector: Central Port
- Block: Orbital Elevator
- Nearest Escape Hatch: Laboratory - Main Entrance Station

Image credit: Rock Paper Shotgun/Capcom
Near this Escape Hatch is a large pit; before dropping down it, turn to the right and jump to reach a ledge that continues onwards into a platform. Go down the set of stairs here and look into the wreckage and dead Lunafilament beneath you to find Mini Cabin Figure #15.
And that's a wrap on the locations of all 15 Mini Cabin Figures in Pragmata. If you're looking for more advice on Diana and Hugh's space adventure, head over to our Pragmata walkthrough hub for five in-depth guides on every Sector of the game. And if you've already beaten Pragmata but haven't yet hit 100% in every Sector, take a look at our guide on how to unlock the secret ending.