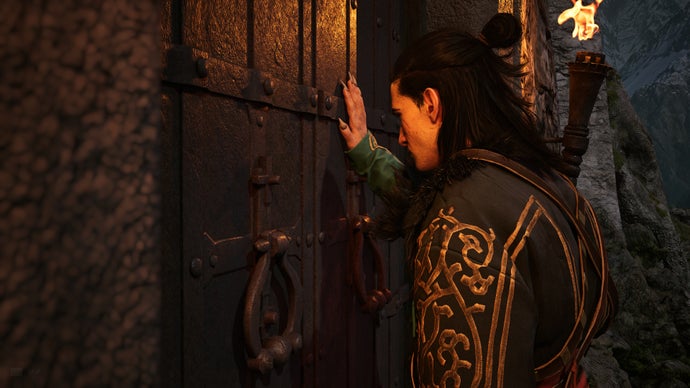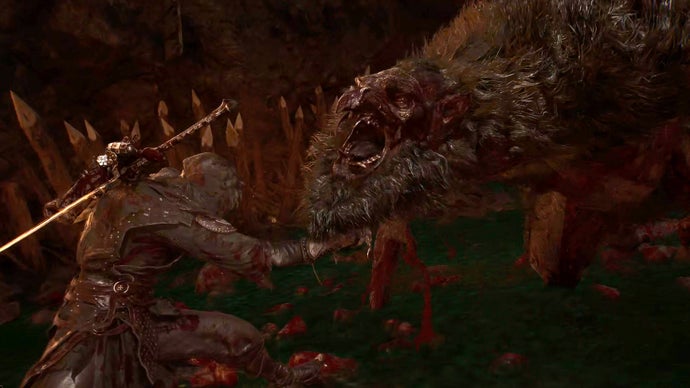
Mortal Shell 2: Flooded Village walkthrough (Part 5)
πŸ–₯ PlayStation, Xbox, PCGuides / Walkthroughs
#Mortal Shell II#PC#PS5#Single Player#Xbox Series X/S

Mortal Shell 2: Flooded Village walkthrough (Part 5)

Rock Paper Shotgun » Guides✍ Ollie Toms⏱ 9 min read(20 days ago)

Overview & Key Takeaways

By this point in our Mortal Shell 2 walkthrough, it's about time you expanded the arsenal of sidearms at your disposal. To that end, our next stop is the Flooded Village. Unlike the very similarly named Sunken Village you just came from, the Flooded Village is a mere optional dungeon - but it holds two things of great interest: an optional boss, and a powerful new weapon which will serve you well for the rest of the game.

Follow along with the steps below in our Flooded Village walkthrough, and I'll show you how to find and open the path to the Flooded Village dungeon, and how to conquer its interior and lay claim to the prize within.

Read more

By this point in our Mortal Shell 2 walkthrough, it's about time you expanded the arsenal of sidearms at your disposal. To that end, our next stop is the Flooded Village. Unlike the very similarly named Sunken Village you just came from, the Flooded Village is a mere optional dungeon - but it holds two things of great interest: an optional boss, and a powerful new weapon which will serve you well for the rest of the game.

Follow along with the steps below in our Flooded Village walkthrough, and I'll show you how to find and open the path to the Flooded Village dungeon, and how to conquer its interior and lay claim to the prize within.

Want the walkthrough for a different area of the game? You'll find the full list of all our guides on our Mortal Shell 2 walkthrough hub page!

Flooded Village walkthrough steps:

  1. Speak with Gorf again.
  2. Open the way to the Flooded Village.
  3. Enter the Flooded Village.
  4. Defeat the Grisha.
  5. Retrieve the Damp Key.
  6. Obtain the Forgotten Crossbow.

To see this content please enable targeting cookies.

Manage cookie settings

1. Speak with Gorf again.

Return to the Widow's Overlook Beacon, and head north past the Corrupted Statue once more. While you're passing, you can speak with Gorf the Toad once again.

This time you won't even need to give him a Weltcap. He'll start talking about going off in search of a mate, and thank you once more with a Marsh Pearl.

A Mortal Shell 2 screenshot showing the perfect path the player should take through the Flooded Village according to Rock Paper Shotgun's full walkthrough of the game. A Mortal Shell 2 screenshot showing the perfect path the player should take through the Flooded Village according to Rock Paper Shotgun's full walkthrough of the game.

Image credit: Rock Paper Shotgun/Playstack

If you've reached this point in Gorf's questline, then things may be about to change for Gorf going forward. We'll see what it comes to later on.

Mark step as completed.

2. Open the way to the Flooded Village.

From Gorf's lair, take the left-hand path across the bridge guarded by the Shield Brigand, and you'll reach the location where you first found Ruk's Map of Fainweald [4]. This time, head beyond this area across the next bridge, and cut down the next Shield Brigand you find.

A Mortal Shell 2 screenshot showing the perfect path the player should take through the Flooded Village according to Rock Paper Shotgun's full walkthrough of the game. A Mortal Shell 2 screenshot showing the perfect path the player should take through the Flooded Village according to Rock Paper Shotgun's full walkthrough of the game.

A Mortal Shell 2 screenshot showing the perfect path the player should take through the Flooded Village according to Rock Paper Shotgun's full walkthrough of the game. A Mortal Shell 2 screenshot showing the perfect path the player should take through the Flooded Village according to Rock Paper Shotgun's full walkthrough of the game.

Image credit: Rock Paper Shotgun/Playstack

As the path opens up into a clearing, you'll find several Cultists and a Neophyte Sester on your left guarding a wooden structure in the ground. There'll also be another Sester in the centre of the clearing, guarding a stone sarcophagus.

Kill all enemies in the area, then loot the sarcophagus for a Ventrium.

Ignore the path leading south past the wooden cart for now, it leads to more dangerous territories. Head past it to the far end of the clearing (collecting the 3x Weltcap on your left along the way), and kill the final couple of Frog Cultists on the stone platform. Loot the sarcophagus on the platform for a Laterite this time.

A Mortal Shell 2 screenshot showing the perfect path the player should take through the Flooded Village according to Rock Paper Shotgun's full walkthrough of the game. A Mortal Shell 2 screenshot showing the perfect path the player should take through the Flooded Village according to Rock Paper Shotgun's full walkthrough of the game.

Image credit: Rock Paper Shotgun/Playstack

Now return to the wooden structure and strike it once from the back side. The wooden exterior will be destroyed, revealing another trick archway. Walk through the archway and you'll see that the walled off entrance to the stone building on the right will now be open.

A Mortal Shell 2 screenshot showing the perfect path the player should take through the Flooded Village according to Rock Paper Shotgun's full walkthrough of the game. A Mortal Shell 2 screenshot showing the perfect path the player should take through the Flooded Village according to Rock Paper Shotgun's full walkthrough of the game.

Image credit: Rock Paper Shotgun/Playstack

Head into the stone structure and through the fog.

Mark step as completed.

4. Defeat the Grisha.

As you crash down into the Flooded Village, you'll be attacked by a Mycellian Skulk and a Leechtongue. Kill them, and then destroy the Gloom Tentacle on the side the Leechtongue came from. This is a special Gloom Tentacle which requires more hits, but gives you much more than usual (nearly 3000x Gloom).

A Mortal Shell 2 screenshot showing the perfect path the player should take through the Flooded Village according to Rock Paper Shotgun's full walkthrough of the game. A Mortal Shell 2 screenshot showing the perfect path the player should take through the Flooded Village according to Rock Paper Shotgun's full walkthrough of the game.

Image credit: Rock Paper Shotgun/Playstack

Now head off the elevator in the other direction, and kill the Skulks and Cultists in the immediate area. Directly ahead there will be a bone statue on one of the hut rooftops swallowed up by the ground. Attack the statue for a Laterite.

Return to the start of the elevator. Immediately on your right, there's a small alleyway that leads to some destructible crates. Cut through the crates, and loot the Common Moonshine inside them.

A Mortal Shell 2 screenshot showing the perfect path the player should take through the Flooded Village according to Rock Paper Shotgun's full walkthrough of the game. A Mortal Shell 2 screenshot showing the perfect path the player should take through the Flooded Village according to Rock Paper Shotgun's full walkthrough of the game.

A Mortal Shell 2 screenshot showing the perfect path the player should take through the Flooded Village according to Rock Paper Shotgun's full walkthrough of the game. A Mortal Shell 2 screenshot showing the perfect path the player should take through the Flooded Village according to Rock Paper Shotgun's full walkthrough of the game.

Image credit: Rock Paper Shotgun/Playstack

Just beyond the crates is a trio of Frog Cultists guarding a pickup. Kill them and collect the Ventrium they were guarding.

The only other path out of this area is also blocked by crates, so destroy them and take the right-hand path. This path will lead you to the edge of a boss arena you can drop into, containing a Grisha.

A Mortal Shell 2 screenshot showing the perfect path the player should take through the Flooded Village according to Rock Paper Shotgun's full walkthrough of the game. A Mortal Shell 2 screenshot showing the perfect path the player should take through the Flooded Village according to Rock Paper Shotgun's full walkthrough of the game.

Image credit: Rock Paper Shotgun/Playstack

If you followed our walkthrough of Mushroom Village you'll have fought a Grisha already after releasing the Grisha Pup. This Grisha is scaled a bit higher than the last one - it hits harder and has more health, but otherwise has all the same swipes and lunge attacks. Concentrate on repeated parries of his bread-and-butter three-swipe combo, and you'll quickly get the opportunity for a riposte.

Mark step as completed.

6. Obtain the Forgotten Crossbow.

With the Damp Key in hand, head back across the bridge to the rooftops, and drop down. There's a staircase on the edge of the main building in front of you. Head up it, killing any Skulks that are still alive on the way.

At the top of the staircase you'll find a locked door. Interact with it to open it up using the Damp Key.

A Mortal Shell 2 screenshot showing the perfect path the player should take through the Flooded Village according to Rock Paper Shotgun's full walkthrough of the game. A Mortal Shell 2 screenshot showing the perfect path the player should take through the Flooded Village according to Rock Paper Shotgun's full walkthrough of the game.

A Mortal Shell 2 screenshot showing the perfect path the player should take through the Flooded Village according to Rock Paper Shotgun's full walkthrough of the game. A Mortal Shell 2 screenshot showing the perfect path the player should take through the Flooded Village according to Rock Paper Shotgun's full walkthrough of the game.

Image credit: Rock Paper Shotgun/Playstack

On the table at the far end of the room inside is the reason we came down here in the first place. This is the Forgotten Crossbow - a fast-firing sidearm, much more accurate and flexible than your starting Naylshotte.

The reason it's such a good idea to get the Forgotten Crossbow at this stage is because it makes dealing with a whole host of smaller creatures much easier, and we'll be seeing those creatures more and more in the future. This sidearm makes dealing with enemies like Netopyrs, Infested Wretches, and others trivial.

A Mortal Shell 2 screenshot showing the perfect path the player should take through the Flooded Village according to Rock Paper Shotgun's full walkthrough of the game. A Mortal Shell 2 screenshot showing the perfect path the player should take through the Flooded Village according to Rock Paper Shotgun's full walkthrough of the game.

Image credit: Rock Paper Shotgun/Playstack

That's everything in the Flooded Village completed. Once you've picked up the Forgotten Crossbow, interact with the white orb that's just appeared in the centre of the room to teleport back to the start of the dungeon. From there, head out the way you came, and retrace your steps back to the Blackridge Pass Beacon, ready to finally tackle this frightful new area of Fainweald.

You may also wish to return to Marrow Keep and upgrade the Forgotten Crossbow a couple of times, to make the most of this powerful new weapon!

Mark step as completed.

The Forgotten Crossbow is going to be a huge help going forward. The going is about to get tougher as we enter the most challenging area so far in Fainweald. Continue to follow along with our walkthrough by heading to our Mortal Shell 2 Blackridge Pass walkthrough.
Share:

More in PlayStation, Xbox, PC

Mortal Shell 2: Desolate Keep walkthrough (Part 16)πŸ–₯ PlayStation, Xbox, PC

Mortal Shell 2: Desolate Keep walkthrough (Part 16)

!(https://assetsio.gnwcdn.com/mortal-shell-2-standing-in-desolate-keep.jpg?width=690&quality=85&format=jpg&auto=webp) The Desolate Keep, hidden away behind an illusory wall in the Marrow Keep, is one of the most intriguing dungeons it's possible to find in Mortal Shell 2(https://www.rockpapershotgun.com/games/mortal-shell-2). It may not be the longest dungeon in the game, but it's likely the most layered, with multiple secret passages, and more than a few nods to one of the oldest and most iconic levels in gaming. It's also far more challenging than most areas you can find in Fainweald, which is why we've left it until now to tackle. But now, it's time. Below I'll walk you through exactly how to 100% the Desolate Keep, revealing every secret with easy to follow, step-by-step instructions. Read more(https://www.rockpapershotgun.com/mortal-shell-2-walkthrough-part-16-desolate-keep)

RockGuides / Walkthroughs2 days ago
Mortal Shell 2: Sanguine Caverns walkthrough (Part 15)πŸ–₯ PlayStation, Xbox, PC

Mortal Shell 2: Sanguine Caverns walkthrough (Part 15)

!(https://assetsio.gnwcdn.com/mortal-shell-2-lost-child-close-up.jpg?width=690&quality=85&format=jpg&auto=webp) The Sanguine Caverns can be found at the very northmost point of the Mortal Shell 2(https://www.rockpapershotgun.com/games/mortal-shell-2) map, and contains the game's third major boss: the frightful Lost Child. With everything else in Fainweald now conquered, it's time for us to journey to these far north reaches and cleanse the land of its last scant bits of corruption. Below, I've put together an easy to follow step-by-step guide to the entire region of the Sanguine Caverns, including every dungeon, every foe and boss encounter, and every tucked away valuable item - of which there are several in this area of Fainweald! So, let's begin the last stage of your cleanup of Fainweald with our 100% Sanguine Caverns walkthrough. Read more(https://www.rockpapershotgun.com/mortal-shell-2-walkthrough-part-15-sanguine-caverns)

RockGuides / Walkthroughs2 days ago
The Blood of Dawnwalker: All endings explainedπŸ–₯ PlayStation, Xbox, PC

The Blood of Dawnwalker: All endings explained

!(https://assetsio.gnwcdn.com/TBODCoenEnding.jpg?width=690&quality=85&format=jpg&auto=webp) The Blood of Dawnwalker(https://www.rockpapershotgun.com/games/the-blood-of-dawnwalker) has one main goal for Coen – to save his family. You spend 30 days (and nights) figuring out your best defence against Brencis, levelling up skills, collecting armour and teaming up with allies. But it turns out defeating him isn't the only way to get everyone home safe. In fact, sometimes defeating him might still lead to the demise of your nearest and dearest. I played through the game's four full story endings to see what would happen and, unfortunately, it's bad news for Lunka at almost every turn. There's also three additional early endings you can try on for size, which we'll cover at the end. In this guide I'll fully explain how to get all endings in The Blood of Dawnwalker, and what can happen to your family along the way in each case. Read more(https://www.rockpapershotgun.com/the-blood-of-dawnwalker-endings)

RockGuides / Walkthroughs2 days ago